The Move-In Inspection (Indflytningssyn): Documenting Property Flaws
Alright, my fellow expat adventurer! You've navigated the choppy waters of finding a place, maybe even wrestled with the infamous CPR registration, and now you’re finally about to get the keys to your new Danish abode. But hold your horses before you start dreaming of hygge and minimalist design! There’s one absolutely crucial step that often gets overlooked by newcomers, and frankly, it can be the difference between getting your hefty rental deposit back or waving goodbye to a significant chunk of change: the Indflytningssyn, or move-in inspection. This guide is going to walk you through every nitty-gritty detail, empowering you to protect yourself, your finances, and your peace of mind from day one.
What Exactly is an Indflytningssyn Move-In Inspection?
Let's cut right to the chase: an Indflytningssyn is more than just a casual walk-through with your new landlord. It’s a formal, often legally mandated, inspection designed to document the exact condition of your rental property before you officially take possession. Think of it as drawing a line in the sand, marking exactly what damage, wear, and tear was already present when you moved in, so you’re not held accountable for it when you move out.
The Purpose of This Inspection
The primary purpose of the Indflytningssyn is damage prevention for both you and the landlord. For you, the tenant, it's your absolute best defense against being charged for pre-existing flaws when your lease eventually ends. We've all heard the horror stories (or perhaps lived them ourselves!) of deposits vanishing for things like a tiny scratch on the floor that was already there, or a slightly chipped tile that you didn't even notice until a year later. This inspection is your opportunity to meticulously record every single imperfection, no matter how small, so there’s no room for debate down the line. It validates your specific frustrations: the system can be opaque, and landlords can be strict, which is precisely why you need to be armed with information.
For the landlord, it helps them ensure the property is maintained and allows them to charge for any new damage caused during your tenancy. However, the legal onus is often more on the landlord to conduct this properly, which plays right into your hands if they slip up. It's not just a handshake and a quick peek; it's a critical legal procedure.
Legal Basis and Landlord Obligations
In Denmark, the rules governing rental agreements and inspections are primarily found in the Danish Tenancy Act (Lejeloven). This law is your friend, even if it feels daunting to navigate in a foreign language. Crucially, if your landlord rents out more than one residential unit (which most professional landlords or property management companies do), they are legally obligated to conduct an Indflytningssyn. This means they must invite you to participate in the inspection and provide a written report detailing the apartment's condition.
If the landlord fails to conduct this move-in inspection or doesn't invite you to it, or if they don't provide you with a written report detailing the apartment's condition within a specific timeframe (more on this later), it can work significantly in your favor. In such cases, the landlord may lose their right to claim compensation for damages beyond "normal wear and tear" when you move out. This is a powerful piece of tenant protection, so understanding it is key. Don’t just assume your landlord knows best; know your rights. For a deeper dive into the rental landscape, check out our Renting in Denmark: Complete Guide for Expats (2027).
Your Rights and Responsibilities as a Tenant
As a tenant, you have important rights during this process. First and foremost, you have the right to be present during the Indflytningssyn. You should absolutely exercise this right. Do not let your landlord conduct it alone. You also have the right to inspect the property thoroughly yourself and to have your observations included in the final report. If something is missed, or you disagree with an assessment, speak up! This isn't the time to be shy or overly polite; it's about protecting your deposit.
Your biggest responsibility, alongside attending and documenting, is the critical "14-day defect reporting rule." This rule stipulates that after the move-in inspection, you have 14 days to report any additional defects or damages that you discover and that were not included in the initial report. This is your safety net, your second chance to catch anything you might have missed during the initial walkthrough. We'll explore this more deeply later, but for now, understand that you cannot simply "forget" about a scratch and then bring it up on move-out day. The clock starts ticking as soon as you get the keys.
Preparing for Your Indflytningssyn: A Pre-Move Checklist
Preparation is truly half the battle when it comes to the Indflytningssyn. Walking into this inspection unprepared is like showing up to a job interview without updating your CV – you're immediately at a disadvantage. By taking the time to gather your tools and understand your lease, you’ll not only feel more confident but also be better equipped to spot potential issues and protect your interests.
Gathering Essential Tools and Documentation
This isn't a casual housewarming visit; it's a serious inspection. Treat it as such. You need to come equipped:
- Camera or Smartphone: This is your absolute most important tool. You’ll be taking hundreds of photos and videos. Ensure your phone is fully charged, has plenty of storage, and ideally, has a feature to date/time-stamp photos. This metadata is invaluable as proof. Take wide shots of rooms, then zoom in for close-ups of every single imperfection you find.
- Measuring Tape: Useful for noting specific locations of damage (e.g., "scratch 30 cm from floor on north wall").
- Notepad and Pen: For detailed notes. Don’t rely solely on photos; written descriptions can clarify what the photo might miss.
- Flashlight: Essential for peering into dark corners, under sinks, inside cabinets, and checking for moisture or mold in less visible areas.
- Copy of Your Lease Agreement: You need to have this handy. Specifically, you want to refer to your Typeformular A10: Understanding the Standard Danish Lease Agreement, especially the infamous Section 11, which often contains specific clauses about the apartment's condition and your obligations on moving out.
Knowing Your Lease Inside Out
Before the inspection, sit down and thoroughly read your lease agreement, especially the parts pertaining to the apartment's condition upon move-in and move-out. Look for terms like:
- Nyistandsat (newly renovated/refurbished): This usually means the apartment is expected to be in pristine, like-new condition, and you might be expected to return it in similar condition, potentially covering costs for repainting, floor sanding, etc.
- Nyligt istandsat (recently renovated/refurbished): Similar to nyistandsat, but allows for minor wear.
- Istandsats (renovated/refurbished): Indicates a prior renovation but less stringent than "newly."
- Normal stand (normal condition): This is often the most tenant-friendly term, implying you only need to return it in a state reflecting normal wear and tear.
These terms are critical because they dictate what you might be liable for when you eventually move out. If your lease states "nyistandsat," but you find obvious scuffs on the walls or scratches on the floor during your move-in inspection, you must document these discrepancies. If you don't, the landlord could later argue that you caused them, leading to deductions from your deposit for professional cleaning or renovation. For an in-depth look at these terms, check out Normal vs. Nyistandsat: Maintenance Terms That Dictate Your Deposit. Pay extra attention to Section 11 of Typeformular A10: The Hidden Clauses to Watch For as it can override or add specific conditions not typically found in the standard template.
The Importance of a Witness
Seriously, don’t go it alone if you can help it. Bring a friend, partner, or even a trusted colleague along for the inspection. A witness provides an extra pair of eyes and ears, and critically, someone who can corroborate your findings if a dispute arises later. They can also help keep you calm and focused, as these inspections can sometimes feel rushed or intimidating, especially if you're dealing with a stern landlord or a language barrier.
Their presence adds a layer of accountability. If your landlord knows there’s an independent witness, they might be more diligent and fair in their documentation. Should you ever need to escalate a dispute to the Huslejenævnet (Rent Control Board) or LLO (Joining LLO Tenants' Union: How to Fight Unfair Rent Increases), having a witness statement supporting your claims can significantly strengthen your case. Choose someone observant and reliable, and make sure they understand the importance of what they're witnessing.
The Inspection Day: What to Look For And Where
This is where your meticulousness truly pays off. Every nook, every cranny, every surface needs your attention. Remember, the goal is to document everything that isn't perfect, leaving no room for your landlord to claim you caused it later. Take your time – this is not a race.
Walls, Ceilings, and Floors
Start with the largest surfaces, as these are often where significant costs for repairs or repainting can arise.
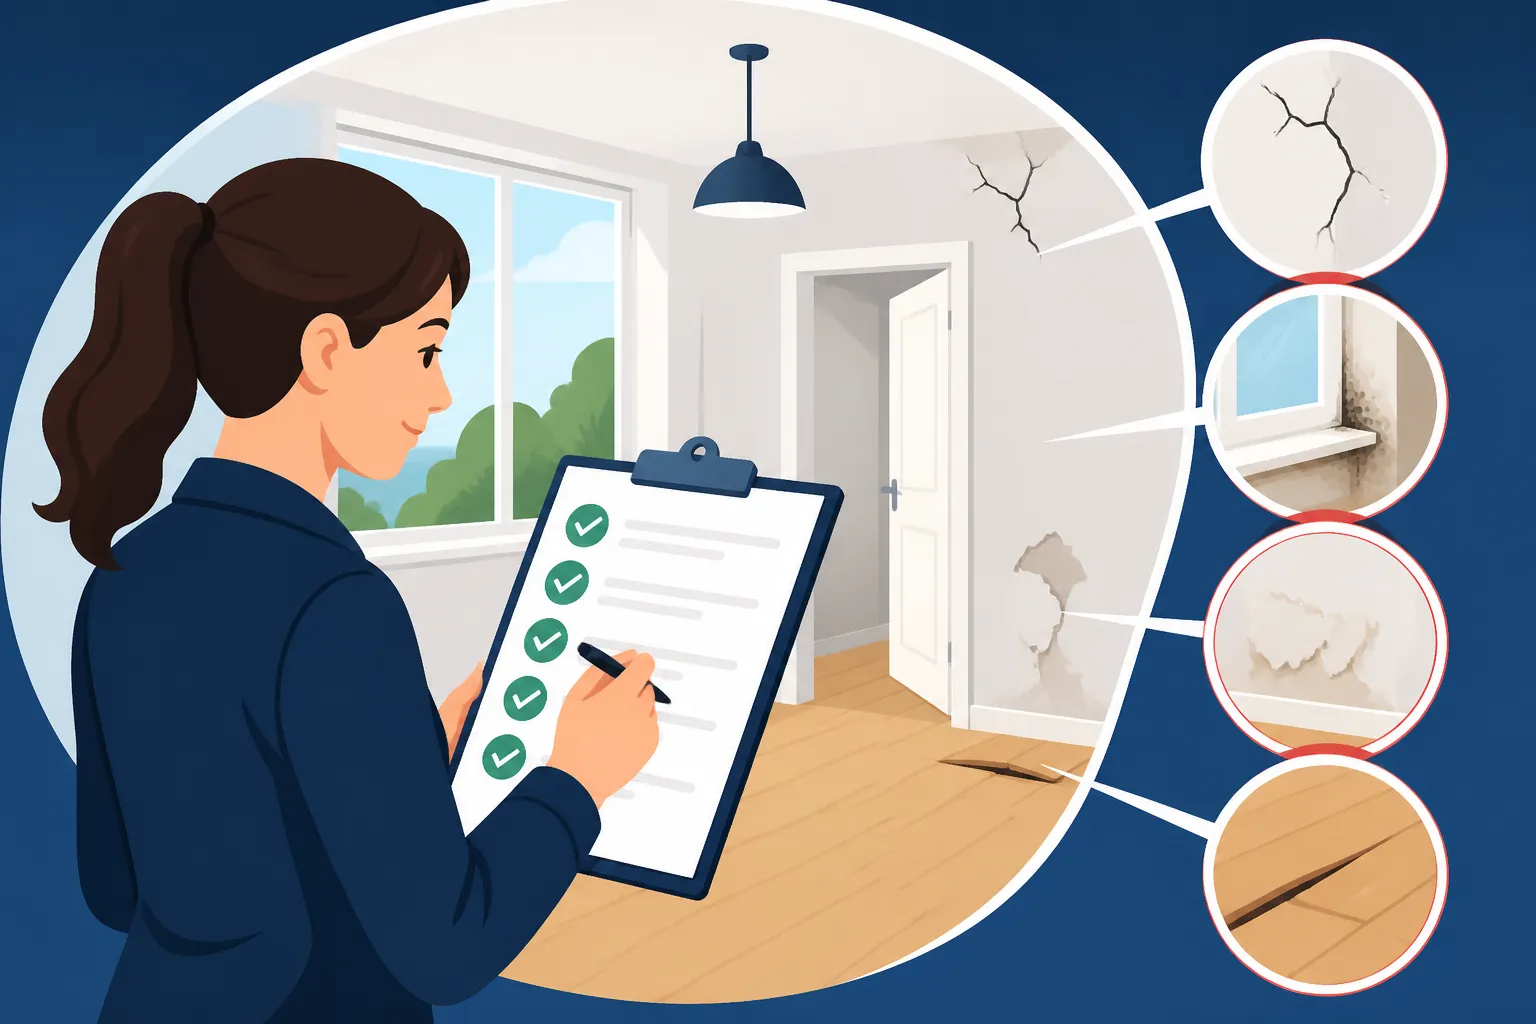
- Walls: Scan every wall for scratches, scuff marks, dents, nail holes (beyond what might be considered reasonable for hanging a picture, if that's even allowed per your contract), and any existing peeling paint or wallpaper. Look for discoloration, especially in corners or behind where furniture might have been – this could indicate dampness or mold.
- Ceilings: Check for cracks, water stains (especially around light fixtures), or signs of previous leaks. This can be tricky if the lighting is poor, so use your flashlight.
- Floors: This is a big one. Hardwood floors are common in Denmark and can be expensive to sand and refinish. Look for deep scratches, gouges, water damage, lifting boards, or significant wear in high-traffic areas. For carpets, check for stains, tears, or excessive wear. For linoleum or vinyl, look for tears, bubbles, or discoloration. Document every single flaw with photos and notes. Even small, seemingly insignificant scratches can add up to a costly deduction if not noted.
Kitchen and Bathroom Deep Dive
These areas are hotspots for potential deposit deductions due to their high usage and susceptibility to water damage or appliance issues.
- Kitchen:
- Appliances: Test every appliance – oven, stovetop, dishwasher, refrigerator, freezer. Are they working correctly? Are there any missing shelves or trays? Are they clean? (Often, apartments are not professionally cleaned between tenants, and "basic clean" can vary wildly). Document any existing stains, dents, or signs of malfunction.
- Cabinets and Countertops: Check for scratches, stains, water damage, peeling laminate, loose hinges on cabinet doors, or drawers that don't close properly.
- Sink and Faucets: Check for leaks, low water pressure, or dripping faucets. Is the drain clear? Look for limescale build-up (Tips for Dealing with Denmark's Extremely Hard Tap Water Kalk), especially if your lease expects it kalkfri (limescale-free).
- Bathroom:
- Plumbing: Test the toilet flush, check for leaks around the base, and inspect the shower/bathtub for cracks or chipped tiles. Check under the sink for any signs of leaks or moisture. Ensure the drains are clear and water flows freely.
- Tiles and Grout: Look for cracked or missing tiles, discolored grout (often a sign of mold or lack of cleaning), especially in the shower area.
- Ventilation: Is there a working exhaust fan? Proper ventilation is crucial for preventing mold in Danish bathrooms, which often lack windows. Look for signs of mold or mildew on walls and ceilings (Managing Humidity and Mold Skimmelsvamp During Danish Winters).
Windows, Doors, and Fixtures
These structural elements can often have subtle issues that are easy to miss but costly to fix.
- Windows: Open and close every window. Do they operate smoothly? Are there any drafts? Check for cracked panes, damaged frames, or faulty locks. Look for signs of moisture between double-glazed panes.
- Doors: Open and close all interior and exterior doors. Do they latch properly? Are there any visible damages like scratches, dents, or holes? Check hinges and handles for looseness or damage.
- Fixtures: Check all light switches and power outlets to ensure they work. Note if any light fixtures are missing (it's surprisingly common for Why Your Danish Apartment Comes Without Light Fixtures). Test any blinds or curtain rods if they are part of the rental. Don't forget to locate and ensure the smoke detector is present and functional. This is a critical safety item.
Documenting Everything: Photos, Videos, and Notes
I cannot stress this enough: document, document, document!
- Photos: Take wide-angle photos of each room from different angles, then zoom in on every single defect. Take multiple photos of each flaw from different angles and distances. Good lighting is key. Ensure your photos are high-resolution and that your device automatically adds a date and time stamp.
- Videos: Walk through the apartment narrating what you see. Point out damages, test appliances, flush toilets, turn on faucets. "Here is a scratch on the kitchen countertop, approximately 10 cm long, near the sink." "The oven light is not working." Videos provide contextual proof that photos sometimes lack.
- Notes: Your written notes should complement your photos and videos. Be specific. Instead of "damaged wall," write "gouge on the living room wall, approximately 1 meter from the floor, to the left of the window, measuring 5 cm in length." Cross-reference your notes with photo numbers or video timestamps. Make sure your notes are legible and clear, especially if you need to refer to them later for the 14-day report or a dispute.
After the Indflytningssyn: Crucial Follow-Up Actions
The inspection itself is only the first hurdle. What you do immediately afterward is equally, if not more, important for safeguarding your deposit. This follow-up period is your last chance to iron out discrepancies and ensure all pre-existing issues are formally acknowledged.
The 14-Day Defect Reporting Period
This is your golden window, my friends, and it’s a non-negotiable step to protect your deposit. The Danish Tenancy Act gives you 14 days from the date you take possession of the apartment (which is usually the start date of your lease, not necessarily the inspection day) to notify your landlord in writing of any defects or damages that were not listed in the official move-in report. Even if the landlord provided a report, you still have this 14-day window to add to it.
Why is this so critical? Because if you fail to report something within this 14-day timeframe, it is legally presumed that the damage occurred during your tenancy, and you could be held liable for it. So, after the initial inspection, spend the next few days (not just hours!) meticulously going through the apartment again in your own time, with your notes, photos, and videos. Test everything. Open all cabinets, run the washing machine, check the heating. Look for subtle things you might have missed in the excitement or stress of the initial walkthrough. Then, compile any new findings into a formal, written document.
You must send this report to your landlord via a method that provides proof of delivery. An email with a "read receipt" request is a good start, but a registered letter (anbefalet brev) from PostNord is even better, as it provides undeniable proof that the landlord received it and when. Keep a copy of your letter and the postal receipt. This detailed process is covered extensively in The "14-Day Defect Reporting" Rule After Moving Into a Rental.
Reviewing and Signing the Report
After the Indflytningssyn, your landlord should provide you with a written report. Do not, under any circumstances, sign this report immediately without reading it thoroughly. If you are not fluent in Danish, bring a trusted Danish-speaking friend or use a translation app. Better yet, insist on taking the report home to review for at least 24 hours before signing.
Compare the landlord’s report with your detailed notes, photos, and videos. Are all the damages you noted accurately reflected? Is the language clear? If there are discrepancies, or if the report glosses over issues you found, you have a few options:
- Refuse to sign: If you feel the report is fundamentally inaccurate and doesn't reflect the true condition.
- Sign with reservations: This is a common and effective tactic. Write "Signed with reservation" (Underskrevet med forbehold) next to your signature, and explicitly state what your reservations are. For example, "Signed with reservation regarding the extent of wall damage, which is more severe than described." This protects you.
- Immediately follow up: If you sign without reservations but later realize something was missed, you still have your 14-day window to send a supplementary report.
Always demand a signed copy of the final report for your records. This, along with your own documentation, forms your primary evidence.
Dealing with Disagreements or Missing Inspections
It’s an unfortunate reality that disagreements can arise. What if your landlord refuses to include something you meticulously documented? Or worse, what if they don't conduct an inspection at all?
- Landlord Refuses to Acknowledge Damage: If your landlord is unwilling to include a significant pre-existing damage in their report, reiterate your points calmly, showing your photos and notes. If they still refuse, sign the report with reservations (as above) and immediately, within your 14-day window, send your own detailed report of the disputed items via registered mail. This creates a clear paper trail of your disagreement.
- Missing Inspection: This can actually be a boon for you. If your landlord, who is required to perform an Indflytningssyn, fails to do so, they may lose their right to claim compensation for damages beyond "normal wear and tear" when you move out. This is a significant tenant protection in Denmark. However, you should still meticulously document the apartment's condition yourself within the 14-day period and send a comprehensive report to the landlord, clearly stating that no move-in inspection was performed. This ensures there's no ambiguity later.
In any scenario where you feel your rights are being infringed upon or if you’re unsure how to proceed, consider contacting LLO (Lejernes Landsorganisation), the national tenants' union. They are an invaluable resource for expats, offering legal advice and support in tenant disputes for a membership fee. They can help you interpret the law and guide you on the best course of action.
How Contextual Brands Can Help
When you're dealing with the stress of moving, every little bit of clarity helps. If you've used a platform like Spotahome to find your rental, they often provide detailed listings and virtual tours, which can give you a preliminary idea of the apartment's condition. While these platforms can connect you with landlords and help simplify the initial search, remember that the official Indflytningssyn is a separate, critical legal step that falls directly on your shoulders to manage with the landlord. Think of Spotahome as a useful tool for finding the apartment, but your own due diligence during the Indflytningssyn is what truly protects your deposit. They don't replace your need to be thorough during the actual physical inspection.
Common Expat Pitfalls and How to Avoid Them
Moving to Denmark, with its new language, culture, and administrative systems, presents enough challenges without the added stress of a rental dispute. Expats, in particular, often fall into certain traps during the move-in inspection due to unfamiliarity or a desire to be polite. Learning from these common mistakes can save you a lot of headache and money.
Language Barriers and Misunderstandings
Danish legal documents, like your lease and the inspection report, can be dense and full of specific terminology. Relying solely on Google Translate for critical legal text is risky.
- Bring a Danish Speaker: If possible, have a Danish-speaking friend, colleague, or even a professional translator accompany you to the Indflytningssyn and help you review the report. Their understanding of nuance can be invaluable.
- Confirm in Writing: Even if you discuss something verbally with your landlord, always follow up with an email to confirm your understanding. "Just to confirm our discussion during the inspection, we agreed that the scratch on the bathroom door was pre-existing and would be noted in the report." This creates a written record.
- Translate Your Lease: Invest time in fully understanding your lease. While this article offers guidance, a full translation of your Typeformular A10 into English, clause by clause, might be necessary for your peace of mind. Check out our guide on Translating the Typeformular A10 Contract into English: Clause by Clause.
Rushing the Process and Feeling Pressured
Landlords are busy people, and they might try to rush through the inspection. This is where you need to stand your ground.
- Take Your Time: Remind yourself that this is your deposit on the line. Politely but firmly state that you need adequate time to inspect everything. Don't be pressured into signing a document you haven't fully reviewed.
- Don't Be Afraid to Point Out Flaws: Danes are generally direct, and while it might feel uncomfortable to point out every flaw, it's expected in this context. You're not being rude; you're being responsible. It's far better to be thorough now than to fight for your money later. Remember the substantial Initial Rental Costs: Navigating Deposits and Prepaid Rent Laws you've already paid.
The "Normal Wear and Tear" Myth
This is perhaps the biggest point of contention between landlords and tenants worldwide, and Denmark is no exception. Normal slid og ælde (normal wear and tear) refers to the deterioration that occurs naturally through ordinary use, not through negligence or misuse.
- What it is NOT: A large wine stain on the carpet, a hole in the wall, a broken window, or significant scratches on a newly varnished floor are generally not considered normal wear and tear.
- What it IS: Faded paint due to sunlight, minor scuffs on walls in high-traffic areas, slight discoloration of grout over years, or minor, superficial scratches on a floor from daily walking might be. However, landlords in Denmark can be very strict. If your lease states the apartment must be returned nyistandsat, then even minor wear might be seen as grounds for charging you. This is why documenting every pre-existing detail, no matter how small, is essential. The guide The Move-Out Inspection (Fraflytningssyn): Getting Your Deposit Back further elaborates on how this plays out when you leave.
By being informed, methodical, and assertive (in a polite Danish way, of course!), you can navigate the Indflytningssyn effectively and set yourself up for a smoother, less stressful rental experience in Denmark.
| Area of Inspection | What to Look For (and document!) |
|---|---|
| Walls & Ceilings | Scratches, scuffs, dents, nail holes, peeling paint/wallpaper, water stains, cracks, discoloration (potential mold). |
| Floors | Deep scratches, gouges, water damage, lifting boards, stains (carpets), tears/bubbles (linoleum), excessive wear in high-traffic areas. |
| Kitchen Appliances | Functionality (oven, stove, dishwasher, fridge/freezer), cleanliness, missing parts, dents, scratches, rust. Test all burners/elements. |
| Kitchen & Bathroom Plumbing | Leaks (under sinks, around toilet/shower), dripping faucets, low water pressure, slow drains, visible mold/mildew around fixtures, cracked tiles, discolored grout. |
| Windows & Doors | Operation smoothness, drafts, cracked panes, damaged frames, faulty locks, scratches/dents on doors, loose hinges/handles. |
| Cabinets & Storage | Scratches, dents, peeling laminate, loose hinges, drawers that stick or don't close, missing shelves. |
| Light Fixtures | All switches work, lights turn on. Note if any fixtures are missing entirely (common in Denmark). |
| Heating/Ventilation | Heaters work. Any strange noises from radiators. Bathroom exhaust fan works. Any signs of mold (especially important in Denmark's humid winters). |
| General Cleanliness | Note any excessive dirt, grime, or stains that would require more than a standard clean. Be specific, as "basic clean" is often your responsibility on move-out. |
| Safety Devices | Is a smoke detector present and working? (Check battery or test button if accessible). |
Disclaimer
The information provided in this guide is intended for general informational purposes only and does not constitute legal advice. While we strive to offer accurate and up-to-date information for expats in Denmark, laws and regulations can change. It is always recommended to consult with a legal professional or a tenant's association like LLO for advice specific to your individual situation.