How to Set up a Home Alarm System (Alarmsystem) in Your Rental
Moving to Denmark, you’ll quickly notice a deep sense of trust and community, which is absolutely lovely. But even in a country renowned for its safety, the instinct to secure your personal space is completely natural, especially when you’re navigating a new rental home. This guide is for all of you who want to explore how to set up a home alarm system in your Danish rental, without accidentally breaking your lease or offending your landlord. We’ll cover everything from getting permission to choosing the right system for your peace of mind.
Understanding Alarm Systems in Danish Rentals: What You Need to Know First
When you first arrive in Denmark, you might feel a bit disoriented by how open and trusting everything feels. People leave baby strollers with babies sleeping outside cafes, and bikes often aren't locked with the same ferocity as in other major cities. This isn't to say crime doesn't exist, but the general societal fabric is built on a high degree of trust. However, that doesn't mean you, as an expat, shouldn't feel entitled to your own level of comfort and security in your home. It’s perfectly normal to want to protect your belongings and feel safe, regardless of local crime statistics.
The Danish Context: Safety vs. Security Mindset
Denmark consistently ranks as one of the safest countries in the world. Crime rates, particularly for violent crime and burglary, are relatively low compared to many other nations. This means that for many Danes, a sophisticated home alarm system might not be their first thought when moving into a new place. Their "security mindset" often revolves more around collective safety and social trust rather than individual fortress-building.
However, for us expats, especially those coming from countries with higher crime rates or simply a different culture around home security, this can be a bit of an adjustment. You might still want that extra layer of protection, not necessarily because you anticipate a break-in around every corner, but simply because it gives you peace of mind. It’s a completely valid feeling, and it’s about your personal comfort in your home. Don't let anyone tell you it's "un-Danish" to want to feel secure; it's simply a personal preference. The important thing is to approach it in a way that respects your rental agreement and your landlord.
Lease Agreements and Landlord Permissions
This is where the rubber meets the road for renters. Unlike owning a home where you can pretty much drill and wire as you please (within local regulations, of course), a rental property comes with specific rules and restrictions. Your lease agreement, often the standard Typeformular A10, will contain clauses about modifications to the property. Any installation that involves drilling into walls, running visible cables, or making permanent changes to the building structure absolutely requires your landlord’s explicit, written permission.
Let's imagine a scenario: You've found a great apartment through a platform like Spotahome, you’ve signed the lease, and now you're thinking about adding a fancy, wired alarm system. If you proceed without permission and start drilling holes for sensors and control panels, you could be in breach of your contract. This could lead to significant problems when you move out, potentially costing you your entire deposit (and then some!) if the landlord demands the property be restored to its original condition. Even if you repair the holes, the quality of the repair might not meet the landlord’s standards. This is why understanding your lease, and initiating a polite conversation with your landlord before doing anything, is paramount. Explain your desire for increased security and ask what kind of systems they would permit. They might even have a preferred solution or provider. This early communication can save you a world of trouble down the line and help you avoid disputes during The Move-Out Inspection (Fraflytningssyn): Getting Your Deposit Back.
Types of Alarm Systems Suitable for Renters
Given the restrictions of renting, certain types of alarm systems are much more renter-friendly than others.
-
Wired Systems: These are the traditional, often professionally installed systems where sensors and control panels are connected by physical wires running through walls or conduits. They are highly reliable but require drilling, extensive installation, and are generally not suitable for rental properties unless specifically installed by the landlord or with their express permission for a very long-term tenant. You're unlikely to be responsible for setting one of these up in a typical Danish rental.
-
Wireless Systems: This is usually your best bet as an expat renter. Wireless systems use battery-powered sensors and communicate with a central hub via radio frequencies or Wi-Fi.
- Pros for renters: Easy installation (often adhesive-based, minimal drilling), portable (you can take them with you when you move!), flexible, and often controllable via a smartphone app.
- Cons: Can be susceptible to signal interference, batteries need replacing, and basic DIY systems typically rely on self-monitoring unless you subscribe to a professional service.
-
Self-Monitored Systems: These are typically wireless DIY systems where you, the homeowner, receive alerts on your phone or computer. You are responsible for contacting the police or a neighbor if an alarm is triggered. They are great for budget-conscious renters who want control.
-
Professionally Monitored Systems: These systems, whether wired or wireless, are linked to a central monitoring station that alerts the authorities or a security team if an alarm goes off. Companies like Verisure or Falck are prominent in Denmark. While more expensive due to monthly fees, they offer greater peace of mind and often come with professional installation. However, remember the landlord permission rule still applies if any installation goes beyond simple stick-on sensors.
For most expats in rentals, a wireless, self-monitored system (possibly with optional professional monitoring later) is the most practical and hassle-free choice.
Choosing the Right Alarm System for Your Rental Home
Now that you understand the lay of the land, let's dive into picking an alarm system that actually works for your rental situation. You want something effective, easy to manage, and most importantly, won't cause headaches with your landlord or when you eventually move out.
Wireless DIY Systems: The Expat-Friendly Option
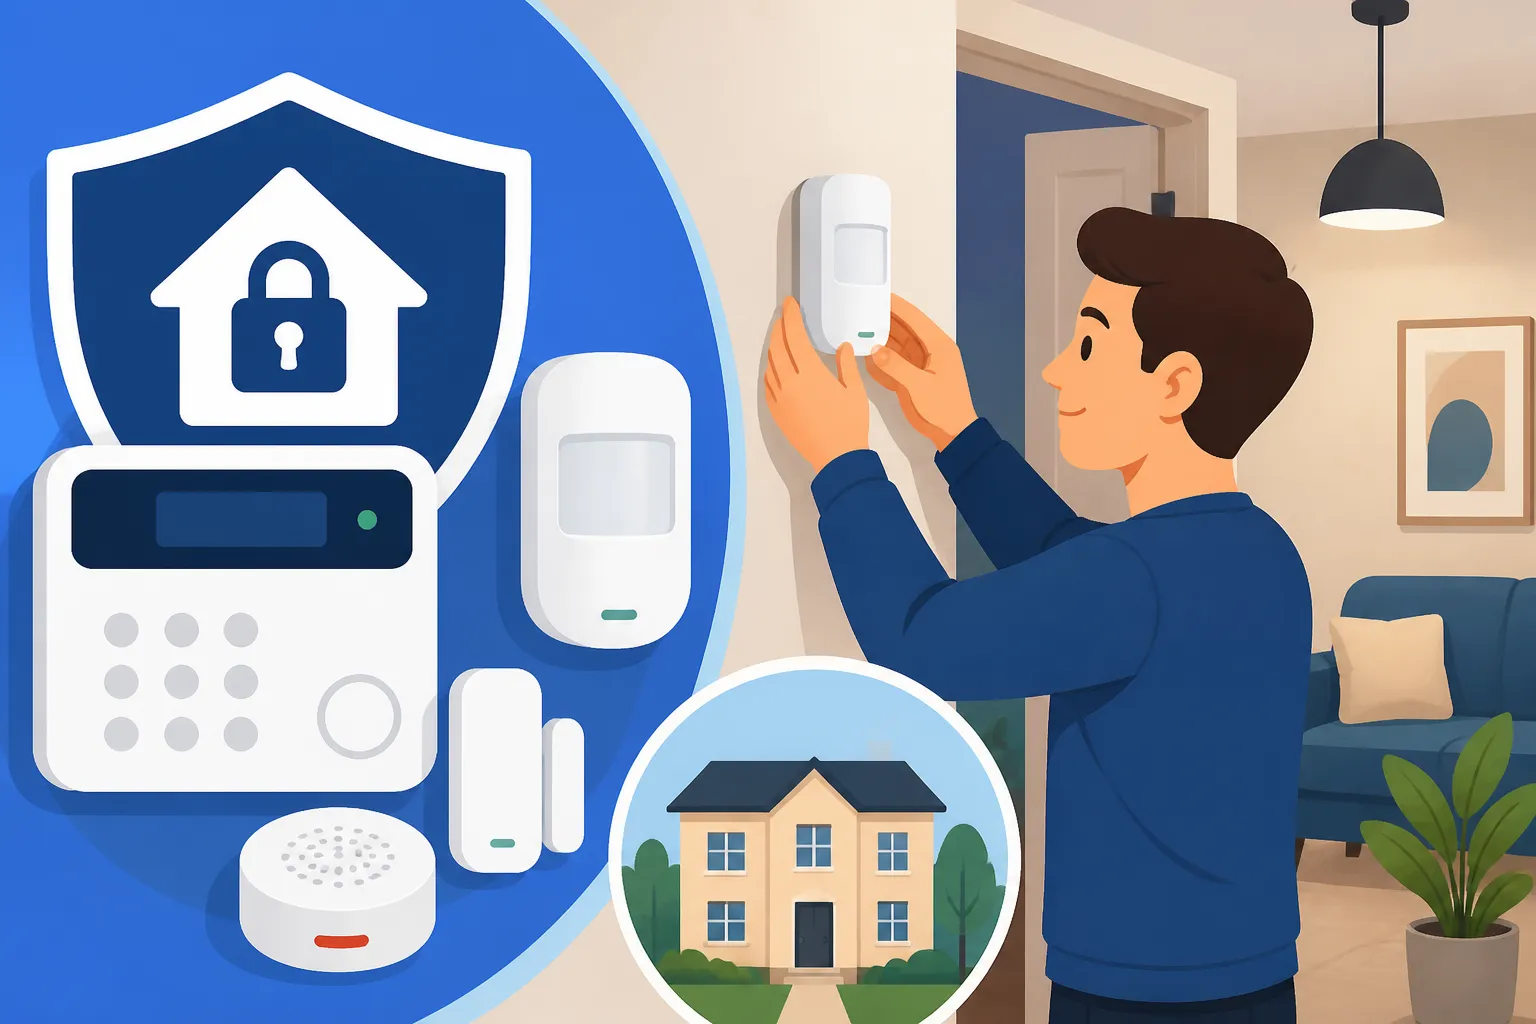
For many of us navigating the rental market in Denmark, a DIY wireless smart home security system is the perfect sweet spot. These systems have come a long way and offer robust security features without demanding a professional installation team or significant alterations to your rented property. Think of them as modular, flexible components you can set up yourself.
You'll typically find a central 'hub' that connects to your home's Wi-Fi network. From there, you add various sensors:
- Door and window sensors: These are usually two small magnets that detect when a door or window is opened. They often stick on with adhesive strips, so no drilling is needed.
- Motion detectors: Place these in strategic areas to catch any movement inside your home. Again, many are adhesive or freestanding.
- Security cameras: Indoor cameras can offer live feeds, motion detection, and two-way audio. Outdoor cameras might require more robust mounting, so always check with your landlord. Video doorbells, like those from Ring or Arlo, are fantastic for seeing who’s at your door, but mounting them can involve drilling if you want them permanently fixed, so ensure you have the okay.
- Keypads/Fobs: For easy arming and disarming without needing your phone.
The beauty of these systems is their portability. When you decide to Changing Your CPR Address via Borger.dk When You Move, you can simply unmount them and take them to your new place. This saves you money and the hassle of setting up a new system from scratch. Brands like Ring, Arlo, Google Nest, and Somfy (which also offers smart home integration) are popular choices and readily available in Danish electronics stores or online. They often integrate well with other smart home devices you might already have, from lighting to smart plugs, giving you a more comprehensive home automation setup that contributes to security.
Professional Installation and Monitoring: When It Makes Sense
While DIY systems offer flexibility, there's definitely a time and a place for professional systems. If you're planning a very long-term stay in a particular rental (perhaps several years) or if your landlord is particularly security-conscious and open to it, a professionally installed and monitored system could be an excellent choice.
In Denmark, prominent players in this space include Verisure, Falck, and G4S. What sets them apart?
- 24/7 Professional Monitoring: This is the biggest draw. If your alarm triggers, a central station is immediately notified. They can verify the alarm (often through internal cameras or by calling you) and then dispatch security personnel or contact the police if a verified threat is detected. This eliminates the need for you to constantly monitor alerts on your phone.
- Rapid Response: These companies often have their own security guards who can respond to an alarm much faster than the police, especially for non-emergency situations.
- Robust Equipment: The hardware tends to be more sophisticated and tamper-proof than basic DIY kits.
- Insurance Benefits: Sometimes, having a professionally monitored alarm system can lead to a slight reduction in your home contents insurance (Indboforsikring) premium. It's worth checking with your provider.
The downsides? Higher upfront costs (installation fees), ongoing monthly subscription fees, and usually a contract commitment. Critically for renters, even if it’s a wireless system, professional installers might still need to drill discreetly for certain components, or for robust outdoor camera mounts. This absolutely requires explicit landlord consent. You might also find it harder to transfer the service if you move, or be locked into a contract that doesn't make sense for a short-term rental. Before even considering this, you need to have a serious chat with your landlord, armed with details of the specific system and installation plan.
Smart Home Integration and Features
Modern alarm systems are rarely just about a siren anymore. They are increasingly part of a larger smart home ecosystem, and this can be particularly appealing for renters who want convenience as well as security.
Imagine this:
- Smart Locks: While changing the actual lock cylinder on a rental door is a big no-no without permission, some smart locks can be installed over existing deadbolts without permanent alteration, or smart keypads can be added. These can allow you to grant temporary access codes to cleaners or guests, and get notifications when your door is locked or unlocked.
- Video Doorbells: As mentioned, these let you see and speak to visitors from your phone, anywhere in the world. Great for screening unexpected callers or package deliveries.
- Smoke and Carbon Monoxide Detectors: Essential for safety, and smart versions can send alerts to your phone, not just sound an alarm in the house.
- Water Leak Sensors: These small devices can be placed near washing machines or under sinks and will alert you to leaks before they become major flood damage – a potential lifesaver for avoiding deposit deductions related to property damage.
- Smart Lighting: You can set lights to turn on and off randomly when you're away, creating the illusion that someone is home. This is a simple, non-invasive security measure.
These integrations not only enhance security by providing more monitoring points but also add a layer of convenience to your daily life in Denmark. For example, you can check your cameras remotely if you get an alert, or even unlock the door for a trusted friend from work. To ensure you stay connected and receive these vital notifications, especially if you're out and about or traveling, having a reliable mobile data plan is essential. Consider using an eSIM from providers like Airalo if you frequently travel and need consistent connectivity for your smart home apps without worrying about local SIM cards.
Installation, Operation, and Maintenance for Renters
Okay, you’ve picked your wireless, renter-friendly system. Now, let’s talk about getting it up and running and keeping it that way, all while being a good tenant.
Step-by-Step Installation for Wireless Systems
The beauty of most modern DIY wireless alarm systems is their straightforward installation. You don’t need to be a tech wizard, just follow the instructions!
- Read the Manual (Yes, really!): Every system is a bit different. Before you even open the box, skim through the manual or watch online tutorials. This will save you time and frustration.
- Choose Your Hub Location: The central hub needs to be connected to power and your home Wi-Fi network. Pick a central spot in your apartment, ideally near your internet router, but not easily visible or accessible from outside. This is a simple plug-and-play step. Remember, reliable internet is key, so make sure your Utilities Setup: Electricity, Water, Heating, and Internet is sorted.
- Place Your Sensors:
- Door/Window Sensors: Most come with strong adhesive backing. Clean the surface first, peel, and stick. Ensure the two pieces align properly when the door/window is closed, with a small gap as specified by the manufacturer (usually a few millimeters). Test them right away to ensure they register correctly.
- Motion Detectors: Place these in corners or areas with clear line-of-sight to entry points. Avoid aiming them directly at heat sources (like radiators) or windows where sunlight or pets might trigger false alarms. Again, adhesive or freestanding.
- Cameras: Position indoor cameras to cover key entry points or valuable areas. Ensure they are plugged into an outlet.
- Connect to Your App: Download the manufacturer’s app on your smartphone. Follow the in-app instructions to connect your hub and then each individual sensor. This usually involves scanning QR codes or pressing a sync button on the devices.
- Test, Test, Test: Arm the system and walk around, open doors, wave at motion sensors. Make sure everything triggers correctly and you receive notifications on your phone. Adjust sensor placement if needed to optimize coverage and minimize false alarms. This initial testing phase is crucial!
Operating Your System: Apps, Codes, and Notifications
Once installed, operating your system should be seamless. Most modern systems are designed for intuitive daily use:
- Arming/Disarming: You'll typically do this via the smartphone app, a dedicated keypad, or a key fob. Get into a routine: arm it "away" when you leave, "home" or "stay" (which might ignore motion sensors but keep doors/windows armed) when you're in for the night.
- Notifications: Configure the app to send you push notifications for any triggers – alarm, low battery, loss of Wi-Fi connection. This is your lifeline to your home's security status.
- False Alarms: They happen! A pet, a falling object, or a strong draft can trigger a motion sensor. Understand how to quickly disarm your system via the app or keypad. For professional monitoring, they’ll usually call you first to verify before dispatching anyone. If you have many false alarms, consider adjusting sensor sensitivity or placement to avoid disturbing neighbors, especially given the general Quiet Hours and Apartment Rules: How to Avoid Neighbor Conflicts in Denmark.
Maintenance and Moving Out Considerations
Maintenance for wireless systems is generally simple, but vital:
- Battery Replacement: Keep spare batteries on hand for your sensors. The app will usually notify you when a battery is low, giving you plenty of time to replace it. This is often the most overlooked maintenance task.
- Cleaning: Dust can interfere with motion sensors or camera lenses. A quick wipe down every few months is usually sufficient.
- Internet Stability: Your wireless system relies on your home internet. If your internet goes down, your system might not be able to send you notifications. Some advanced systems have cellular backup, but for most DIY renters, a stable Wi-Fi connection is crucial.
Crucially, for moving out: Since most of your DIY system uses adhesive, carefully peel off sensors. For any minor marks left by adhesive, a gentle cleaner or even a Magic Eraser can often remove them. Take photos of your walls before and after removing anything, just as you would during The Move-In Inspection (Indflytningssyn): Documenting Property Flaws. Your goal is to leave no trace that an alarm system was ever there, thus ensuring you get your full Initial Rental Costs: Navigating Deposits and Prepaid Rent Laws back.
Cost Considerations and Insurance Implications
Let's be real, moving to Denmark isn't cheap, and adding another expense needs careful thought. When it comes to home alarm systems, you've got to weigh the upfront cost against potential ongoing fees and what, if any, financial benefits it might bring.
Initial Investment vs. Ongoing Fees
The cost structure for alarm systems can vary wildly, largely depending on whether you go DIY or professional.
-
DIY Wireless Systems (Self-Monitored):
- Initial Investment: This is typically the main cost. A starter kit for a reputable brand (like Ring, Arlo, Google Nest) might range from DKK 1,000 to DKK 3,000, depending on the number of sensors and cameras included. You buy the equipment outright.
- Ongoing Fees: Often, there are no mandatory ongoing fees for basic self-monitoring. You get alerts on your phone, and that's it. However, many brands offer optional subscriptions for enhanced features like cloud video storage for cameras (e.g., to review footage later), or sometimes a basic form of professional monitoring for a lower monthly fee. These optional subscriptions might be around DKK 50-150 per month.
-
Professionally Installed and Monitored Systems (e.g., Verisure, Falck):
- Initial Investment: This can vary. Some companies charge an installation fee (which could be several thousand DKK), while others might bundle it into the contract. Sometimes you effectively "rent" the equipment, so the upfront cost is lower, but you don't own it.
- Ongoing Fees: This is where the bulk of the cost lies. You'll typically sign a contract for 12, 24, or 36 months, with monthly fees ranging from DKK 250 to DKK 500 or more, depending on the level of service and equipment. These fees cover 24/7 monitoring, maintenance, and potentially security guard response.
Here's a quick comparison:
| Feature | DIY Wireless System (Self-Monitored) | Professional System (Monitored) |
|---|---|---|
| Initial Cost | DKK 1,000 – DKK 3,000 (equipment purchase) | DKK 0 – DKK 5,000+ (installation, depending on contract) |
| Monthly Fees | DKK 0 (for basic functions), DKK 50-150 (for optional cloud storage/features) | DKK 250 – DKK 500+ (mandatory monitoring, equipment lease) |
| Installation | DIY, very easy, no drilling | Professional, may involve minor drilling |
| Portability | High (take it with you) | Low (often fixed, contract-bound) |
| Monitoring | You monitor via app | 24/7 professional monitoring & response |
| Landlord Permission | Less critical (for non-invasive systems) | Absolutely essential |
| Contract Length | None (for DIY), optional monthly for features | Typically 12-36 months |
Home Contents Insurance (Indboforsikring) and Alarms
Before you rush to install an alarm system hoping for huge insurance savings, it’s important to understand the reality in Denmark. Having Indboforsikring: Why Home Contents Insurance is Crucial for Renters is far more important than any alarm system. This insurance protects your personal belongings against theft, fire, water damage, and more.
While some insurance providers might offer a small discount (often 5-10%) on your Indboforsikring premium if you have a professionally monitored and certified alarm system, it's rarely a substantial amount. For basic DIY, self-monitored systems, it's even less likely to result in a discount, as they don't offer the same level of verified protection.
Key takeaway: Don't get an alarm system just to save on insurance. Get it for your peace of mind and enhanced security. Any potential insurance discount should be seen as a bonus, not the primary driver. Always contact your specific insurance provider (e.g., Tryg, Alm. Brand, Topdanmark) to inquire about their policies regarding alarm systems and potential premium reductions. They will specify what type of alarm (e.g., with direct connection to police, or a certified security company) qualifies for any benefits.
Disclaimer
The information provided in this guide is for general informational purposes only and does not constitute legal or financial advice. While we strive to provide accurate and up-to-date information, rules and regulations in Denmark, especially concerning rental agreements, insurance, and technology, can change. Always consult your specific rental contract, contact your landlord for explicit written permission before making any modifications to a rental property, and speak with your insurance provider for details on coverage and potential discounts related to alarm systems. The author and publisher are not responsible for any consequences resulting from the use of this information.